3D Printing
What started as a hobby quickly developed into something more serious. I enjoy 3D printing because it allows me to create my own models, print them, and sell them to bring joy to others. Additionally, I like to download models for personal projects that I can display.
Architecture
The products I create, are mainly historical buildings.
most used tools
BLENDER, MAYA, CURA


Historical Buildings
I used to live in IJsselstein, a small city with lots of historical buildings. When I began 3D printing, I wanted to create something from my city, so one of my first prints was the 'Castle Tower.' This followed my creation of the Domtoren, a famous tower in nearby Utrecht. I started selling my 3D prints in a local shop in IJsselstein, which motivated me to expand my collection and create more buildings.
How to Make a 3D Printable Model
I always start by gathering enough reference material, such as photos, drone videos, or sketches. Once I have sufficient references, I begin modeling in either Maya or Blender. When creating a 3D model for printing, you don’t need to worry about UVs, allowing more time to focus on the details.
A 3D printable model requires slightly exaggerated details and shapes to ensure they are clearly visible. For models with overhangs, I prefer to separate them into multiple parts. This approach eliminates the need for supports, saving both time and material.


Largest Scale
I once had a customer request a 1-meter tall Domtoren. After exploring the possibilities, I found that to maintain the model's quality, it could not be larger than 78 cm. The model is divided into eight pieces and is hollow inside, allowing the customer to add lights. You can see the results in the album above.

Most Prints
I once had the pleasure of creating over 60 3D prints of my replica of the Korenmolen The Windotter from IJsselstein.
Keychains
I've created various keychain designs for several companies.
And in addition to the historical buildings I create, I also like to make keychain versions for those.
most used tools
BLENDER, MAYA, CURA


Personal Projects
Sometimes, you may not want to design something entirely from scratch. Fortunately, there are many models available online. Here are some of my personal projects that you can see below.
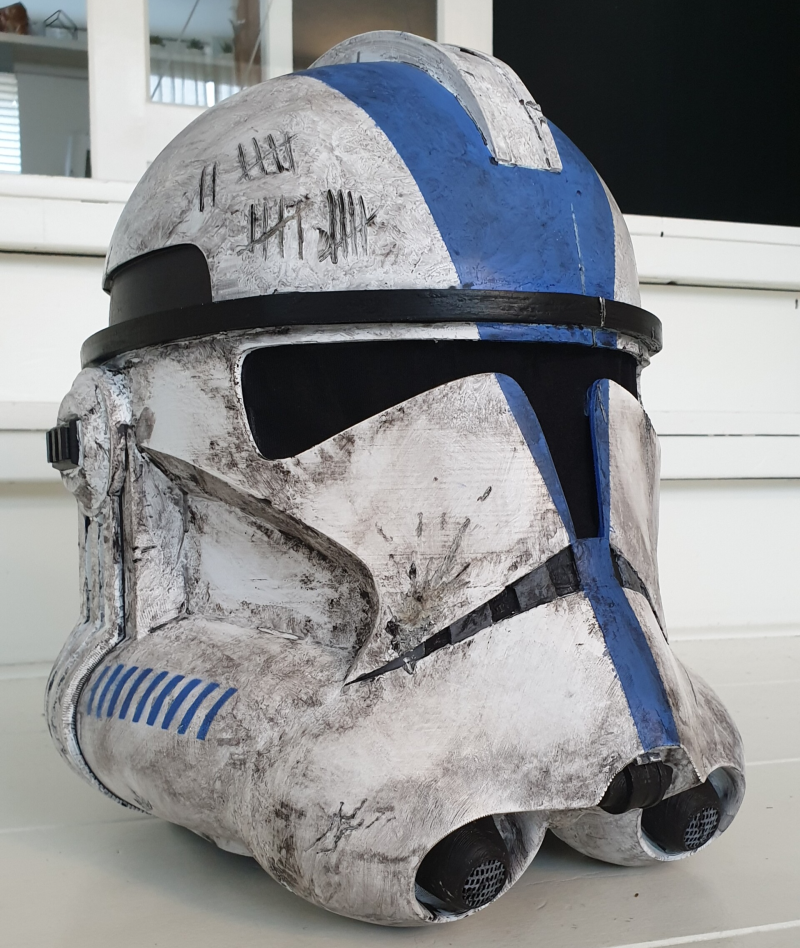
501st Clone Trooper Helmet
For this helmet, which I downloaded from Thingiverse, I had to print approximately 24 pieces. Each piece took an average of 10 hours to print.
I glued these pieces together and then smoothed out the imperfections and sanded the helmet.
To bring the helmet to life, I used paint and lacquer. As a finishing touch, I gave the helmet a "dirt wash" with diluted black paint and added battle damage using heating tools to make it look authentically worn.
Process photos can be seen below.
Work in Progress - ARF helmet
After completing the 501st helmet, I started the next project in the helmet series. Here is an image of an ARF trooper helmet.
I purchased the file from CGTrader.
The helmet consists of approximately 32 pieces with an average print time of 11 hours each. Just like with the 501st helmet, I will go through a process to finish the helmet nicely.
